Craft stampers, card maker of the year award 2010

Craft stampers, card maker of the year award 2010
Posts tonen met het label Gnome. Alle posts tonen

zaterdag 26 juli 2025

Lost Coast Designs Christmas in july challenge.

If you have a lot of cards to make for Christmas, this is a nice, quick card to make.
You can add some glitter or sequins yourself.

I used: 

Color pencils or markers.
Black waterproof inkpad.
Versa Magic, Red magic,
Tea leaves and Sage.
Square or postage die.

I started with Versa Magic Tea Leaves, stamping the christmas tree.

Then the left half with the postcard background stamp and VM sage.

While the background dries, I stamped the little Santa gnome.
I colored him with Derwent Chromaflow pencils.

Using a blender brush, I colored the edges with VM Tea Leaves.

With the VM Red Magic I stamped Merry Christmas.

Mat the card with red and green,
 and stick the square with the Gnome on with 3D foam tape.
And your done.

Now, wasn't that a fun and quick card?
Are you still participating in the challenge?
There's a great prize to be won.
The challenge runs until the end of the month, so there's still time to enter.
Here's the link:


dinsdag 26 november 2024

Gnome postage card for the Lost Coast designs Gnome challenge.


 Hi stampers and cardmakers.
Today it's a short tutorial.
Just stamping and coloring.
It's more about figuring out where each stamp should go.
These gnomes are a nice size for this die.
The flowers will soon be on the webshop.
I also used a waterproof black ink.
I colored with watercolor markers and Derwent inktense pencils.

I started with the postage die from Studio light craftlab.
I used watercolor paper.

With the metal die I made a paper template and numbered the squares.
Then I cut them out.

Take a piece of paper and stamp the gnomes on it.
Now you can puzzle where each gnome fits.
You can also use a piece of a stamp.
I used the flowers for the very small boxes.

Color the boxes as you see fit or as I colored it is of course also allowed.
I chose to do the middle box in pale colors.
This way you get a nice contrast with the bright colors around it.

Matte on a black background, it makes the colours pop even more.

Not that difficult but a nice result.
The challenge runs until the end of the month.
So there is still time to participate and have a chance to win new rubber stamps.
You can participate with other stamp brands as long as there is stamping.
But read the rules first, that prevents disappointment.
So come and participate, it's fun.

vrijdag 15 november 2024

Gnome-vember challenge at Lost Coast Designs/Carmens Veranda stamps. Gift Candy/chocolat box or giftcard box.


Hi there, Today a tutorial on how to make this gift box.
Its a Karen Burnstein die.
But if you have a score board you kan make a matchbox.
This box is made for the,
Lost Coast designs/Carmens Veranda stamps challenge blog.

What I used for this box.

Distress oxide:
Wilted Violet
Peacock feathers
Twisted citron
Spiced marmelade

Strip acetate.
A small piece of ribbbon.
A bead or button.
Color pencils or markers.
White gelpen.
Black ink I used versafine.

Color the box with the four colors of distress oxide. 
Don't forget to do the inside of the drawer too.

Inside of the drawer.

Make a hole in the front of the drawer.
Pull the ribbon through the button or bead and through the hole.
Glue the ribbon and assemble the drawer.

Now you have a pull knob on the front of the drawer.

Stamp the Gnome and the tulip with the Versafine.

Color the gnome and tulip as you like.
Give the gnome and the tulip some accents with a white gellpen.

Take the strip of acetate, 1cm wide and 7cm long. 
Make a fold in the acetate strip at 2cm.
Glue the long piece on the back of the gnome.
And the short piece in the drawer. 

If you now pull the drawer open, the gnome jumps up and offers you a tulip.

To finish the box, take the smallest stamp from the Pieces of calligraphy and the Versafine.
Stamp lightly here and there, it doesn't have to be a perfect print.

With the Long swirl stamp and the oxides I made some small prints.
I did this with Orange on orange and green on green etc.
Let your ink dry.

Now, isn't this a nice gift box?
You can put candy or chocolates in it.
Or a gift card.
Make sure you put it under the gnome.

Are you also making something with a gnome?
Then join the challenge and maybe you will win those new stamps.
You can join with other brands, as long as there is stamping on your art.

So hope to see you on the challenge.


zondag 10 november 2024

Gnome-vember challenge at lost coast designs

 Hello crafters,
At the lost Coast Designs/Carmens Veranda blog there is a gnome challenge.
Always so nice those little funny creatures.
For this card I used The Santa with toys (large)
And the merry Christmas from the Party words sheet.

It is an easy card.
Nice for the beginning card makers.
I took a smooth white double card.
Stamped the santa gnome with black waterproof ink.
Colored it with pencils.
With a stencil and gray ink sponged the stars on the white surface.
Die cut the presents, and glue them on the card.
Stamp the text in black.
Add some glitter to the gray stars.
And that's it, a quick Christmas card with a nice effect.

The design team would love it if you would join the challenge.
There are stamps of your choice to win.
So come to the blog and join in, the challenge runs until the end of the month.


zaterdag 1 juni 2024

New challenge at Lost Coast designs, Red White and Blue.


Hello everybody,
 This month's challengechallenge at lost Coast designs is red, white and blue.
That's nice because next month is the 4th of July celebration in America.
So maybe the lost Coast Designs team can inspire you.
My contribution is this tag with the three gnomes.
And this is how I made it:

Stamps:
For the stripes, Brush strokes.
Party words,Party words,

Versa Magic,
Night sky, red magic.
Versafine onyx black.
Red, white and blue paper.
Banner die, mine has stars in it.
Stencil with small stars.
Border die with stars.
3 small star punches

I started by stamping the gnomes with the black versafine.
To determine the location I divided the tag into three horizontal planes.
So draw 2 thin lines with a pencil to indicate the areas.
Stamp the gnomes on the bottom line.

Mask the gnomes and place masking tape under their feet.

Stamp the four stripes with the long narrow stamp
 of the Brush strokes sheet and the red Versa magic.

Ink up the stencil with the blue versa magic.
Spray some water on it and press on the tag under the gnomes feet.

Because the stars and the dots could not be seen clearly,
I applied some lines with a brush and versamark magic blue.
This makes them easier to see.
I also colored the gnomes this way.
only their noses were done with a skin color pencil.

I die-cut the banner in blue and white paper.
And I swapped the white stars with the blue ones.

I glued the tag to a red, white and blue background.
Then I decorated the tag with the three colors of punched stars.
Stamp the words with the blue versa magic.
And lastly I glued the star border at the bottom of the tag.


I hope you liked it.
Maybe you too make something in these colors.
Then join the challenge and have a chance to win new stamps.
You can participate with stamps from other brands.
Click here for the challenge:challenge:
And here you can find the rules.
Good luck, en till next time.

maandag 8 april 2024

Challenge #184 at Lost Coast Designs, "Fluffy and/or cute". I made a little ATC coin book.


Hi, dont you love this challenge, whell I do.
Cute and fluffy, well these little gnomes are so cute.
 The gnomes are a small version of the large gnomes from Lost Coast designs.


If you like to make ATCs or ATC coins, these are ideal for you.
They are the perfect size for ATC's.
I will explain to you how you can make such a nice ATC coin booklet.
But first, a list of supplies.

The stamps I used:

Other materials I used.
Distress ink.
Crackling campfire
Lucky clover
Peacock feathers
Wilted violet
Musterd seed
Versafine onyx black
Various stencils
Derwent inktense pencils
White gell pen
Acetate sheets
Circle punch and die.
Stencils.

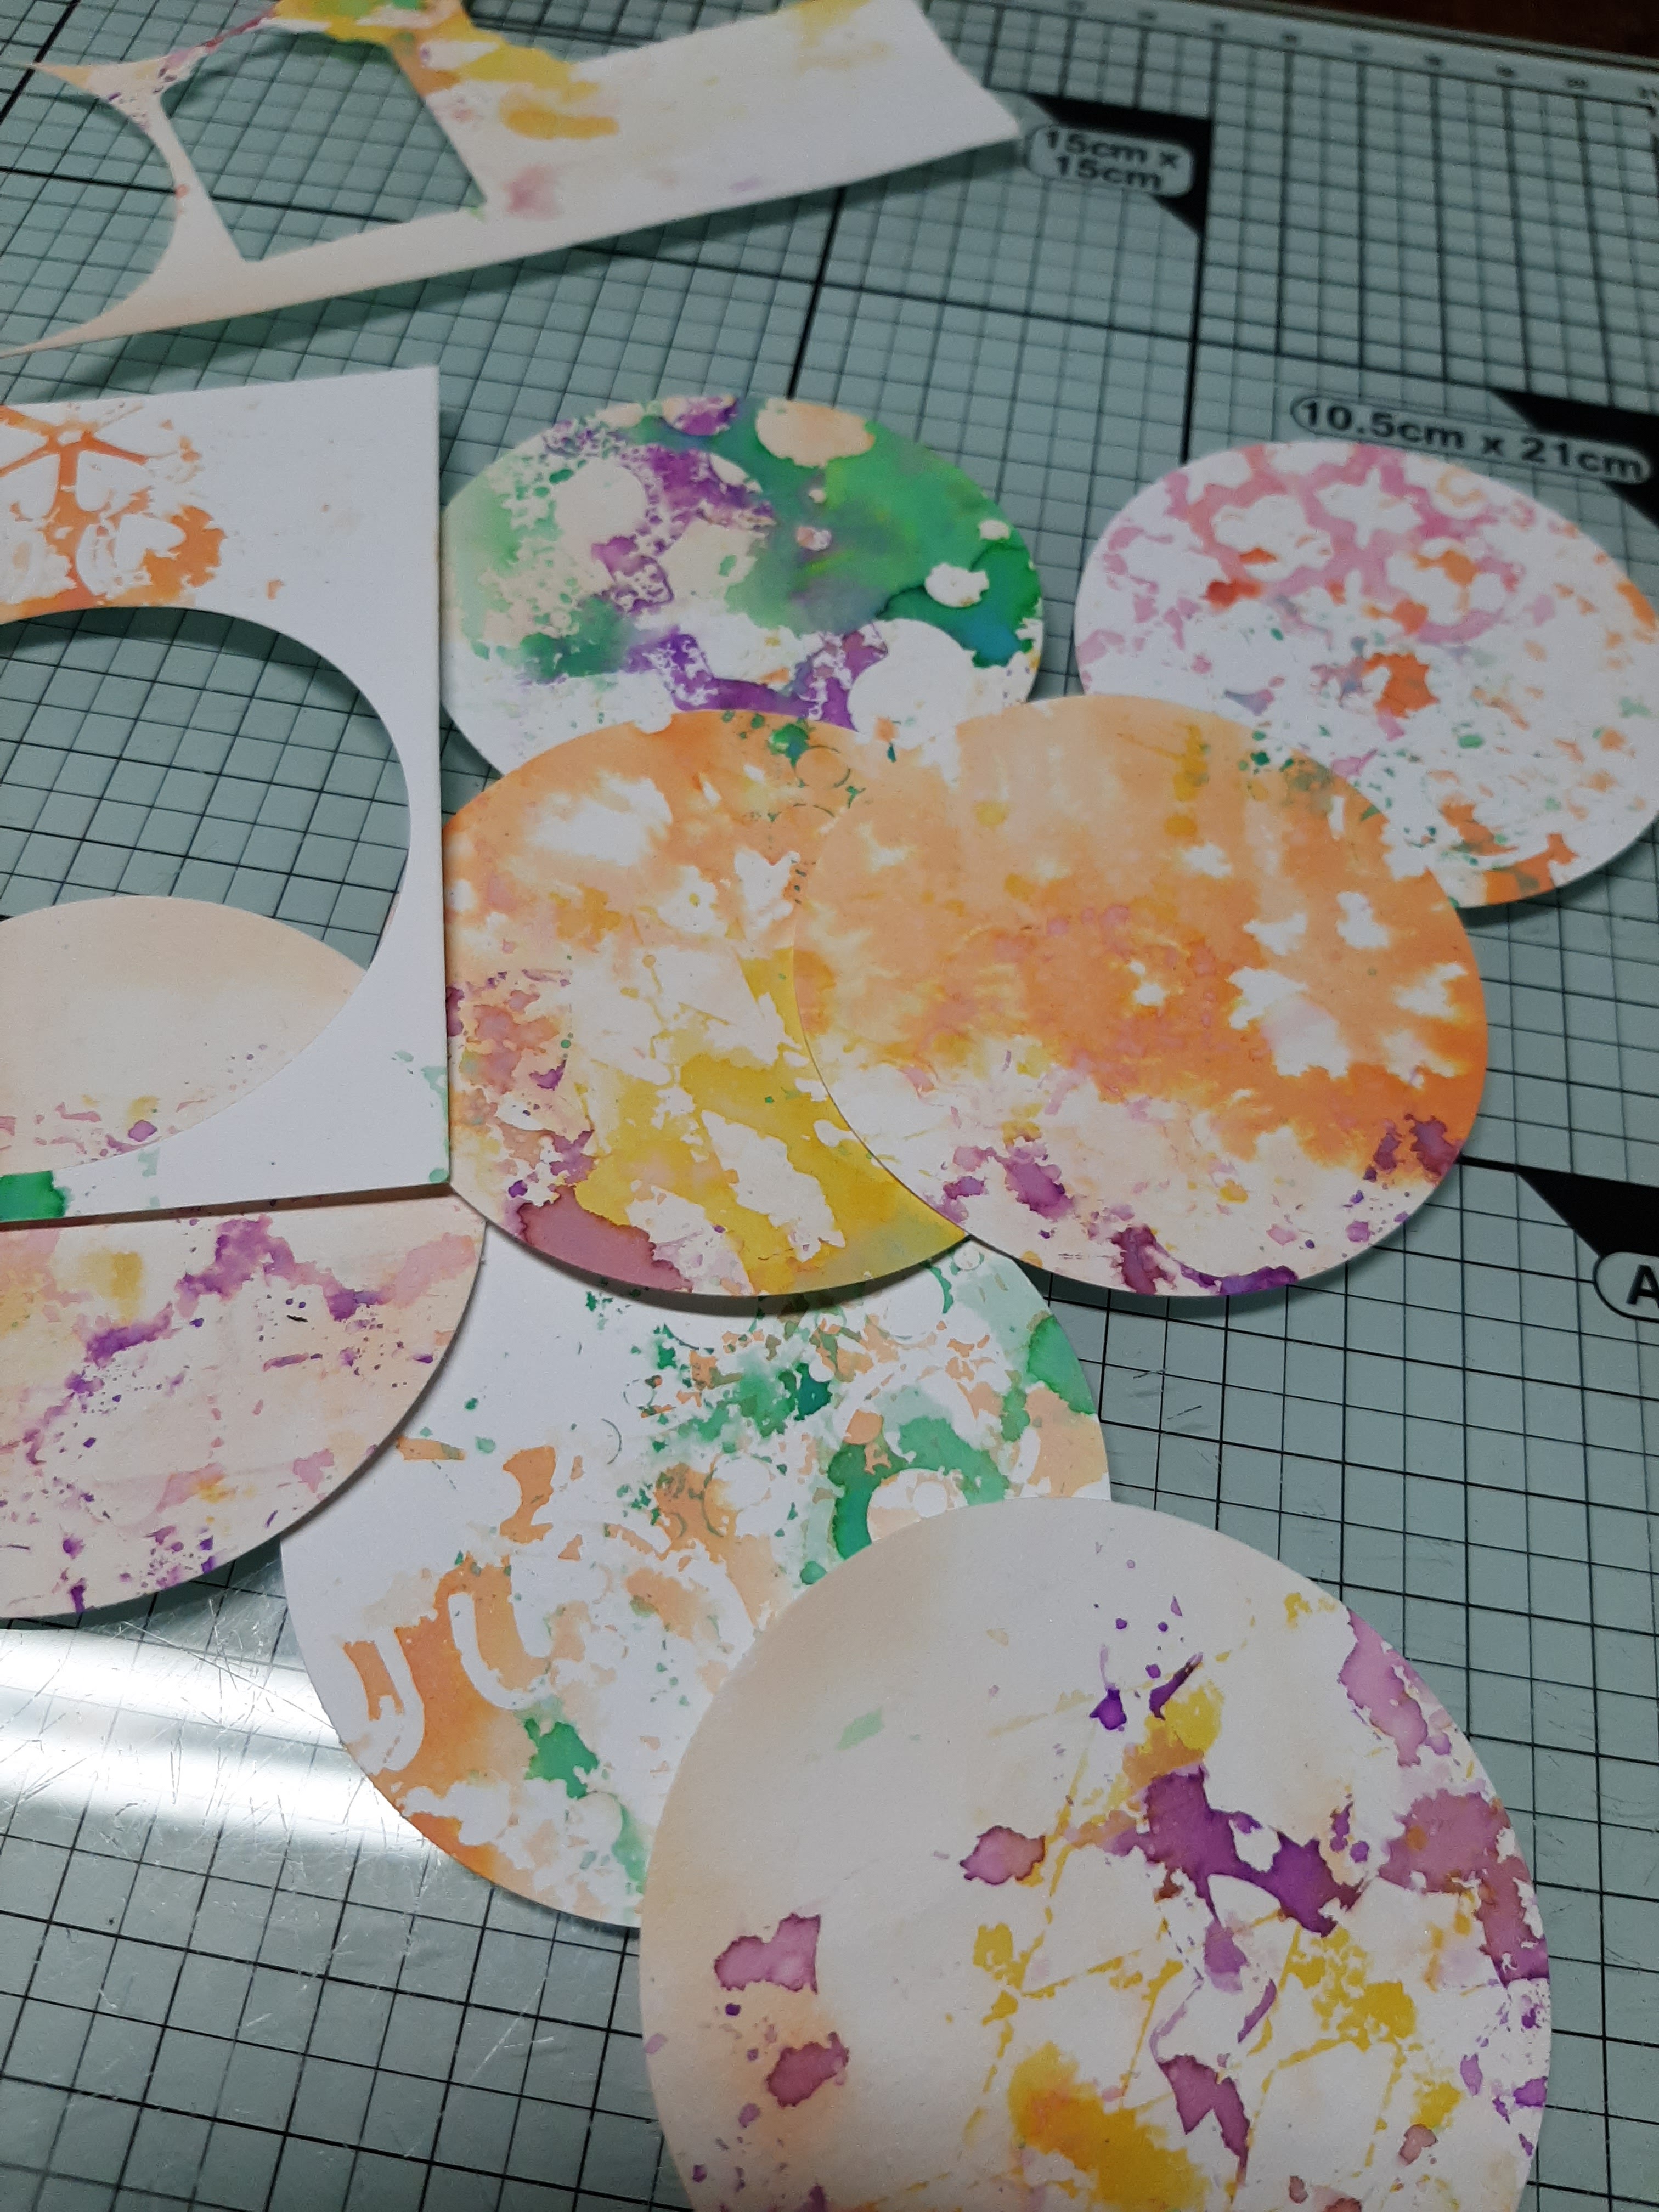
I started making backgrounds.
By applying the ink directly to the stencils and spraying with some water.
Use the stencil as a stamp on your paper.

Look what a quick and fun result this technique gives.

Now punch the number of coins you want to make with a 2.5 inch punch.
My book has 7, because I wanted to make 6 but thought I would have one as a spare.
But I didn't have any mistakes or accidents this time, so I used all 7.

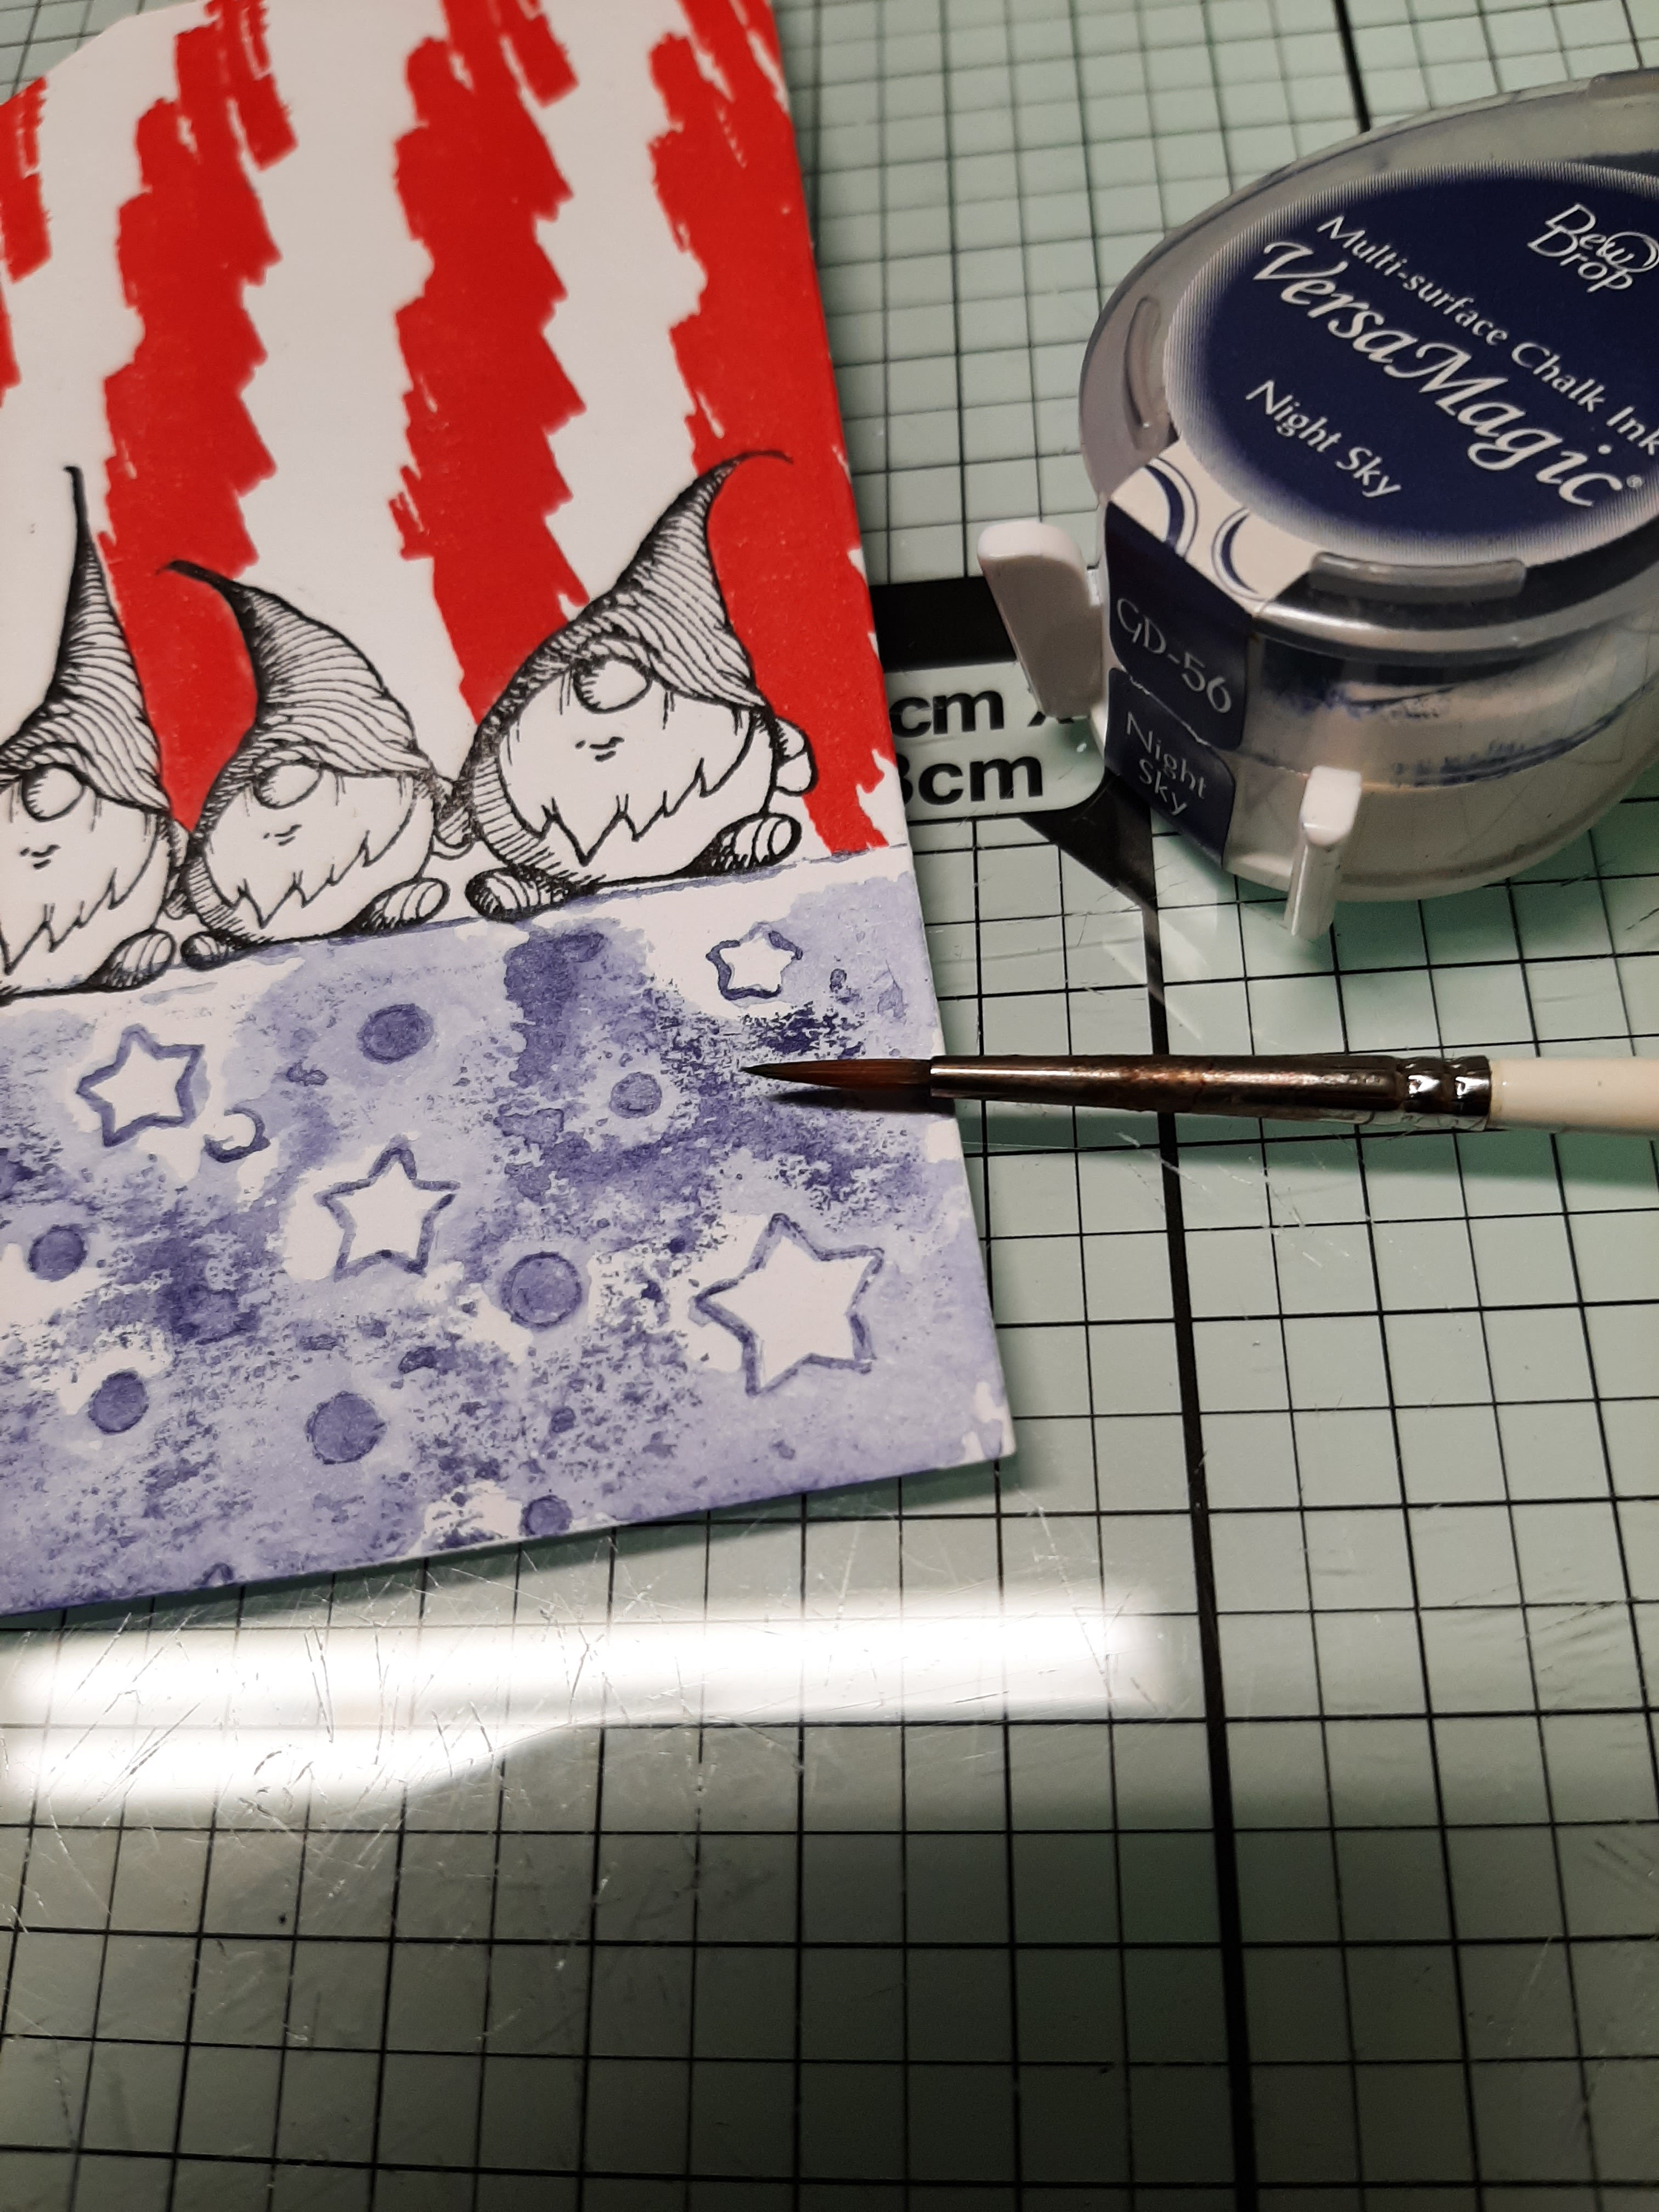
Stamp something on the background of the coins. 
Find something that fits the gnome well.
Stamp the gnomes on thin paper and gleu them on the coins.
The words come from the Misc words sheet.
Very handy to have, there is almost always a word that fits.

Since English is not my language, I find it difficult to explain this.
So I made a drawing with an explanation.
If you don't understand something, feel free to ask me.

Once you have made the page, 
glue an acetated window onto the circle on the inside of the folder.


Do this for every coin you have.

Now for the hinge and cover.
Follow the schedule on the drawing.
For those who have made a mini album before, this is the same way but smaller.
There are many videos on YouTube with clear explanations.
Fold the score lines and stick them with double-sided tape.

Make the cover and gleu the hinge in it.


Now we are going to attach the pockets to the hinge.

We leave the top open.
We stick double-sided tape on the flap at the bottom. 
But leave a cm free of tape on the hinge side.
Apply glue to the hinge and slide the pocket over it.
Press it well.
Now you can put the coin in the pocket.
Decorate the front and back of the cover as you like.
Don't forget to stick a ribbon in between to close the booklet.


I hope you enjoyed it and maybe make an ATC coin book yourself.


Now back to the "Fluffy and Cute" challenge.
This runs until the end of the month.
Maybe you have time to join us.
The team would really like that, and you have a chance to win new rubber stamps.
Don't forget to read the rules to avoid disappointment.
Good luck and see you next time.
Joining these challenges: