Craft stampers, card maker of the year award 2010

Craft stampers, card maker of the year award 2010

dinsdag 20 juni 2023

Challenge # 169 at Lost Coast Designs. Use some words, focus on the sentiment.


This challenge is about words and sentiments. 
At Carmens Veranda stamps you will find a whole page full
 of the most beautiful and funniest sentiments and sayings.
I chose a very nice one for this card.
This time I made a soft background in pastel colors, made with Panpastel.
It seems difficult but it is so easy.
Just follow my steps and you will see what a beautiful result panpastel gives.

What do you need for this card.

You need further.
A black ink pad,(memento).
Versamark
Stencil with small holes.
Modeling paste.

Panpastel:
yellow,
green,
pink,
lilac,
Pan pastel small tools.


You can copy the card or make your own layout.
Whatever you want.
Start with one of the stamps.
Stamp with the Versamark.
Pick up one color of the panpastel with your tool.
Tap over the stamp print, do not wipe before the entire stamp is covered with the powder.
Now you can rub it gently with the panpastel tool.
If you didn't tap first, the stamp would be smeared and you would get a faded stamp impression.

Now you repeat this process with a different stamp and different color.
This way you fill every spot on the card.
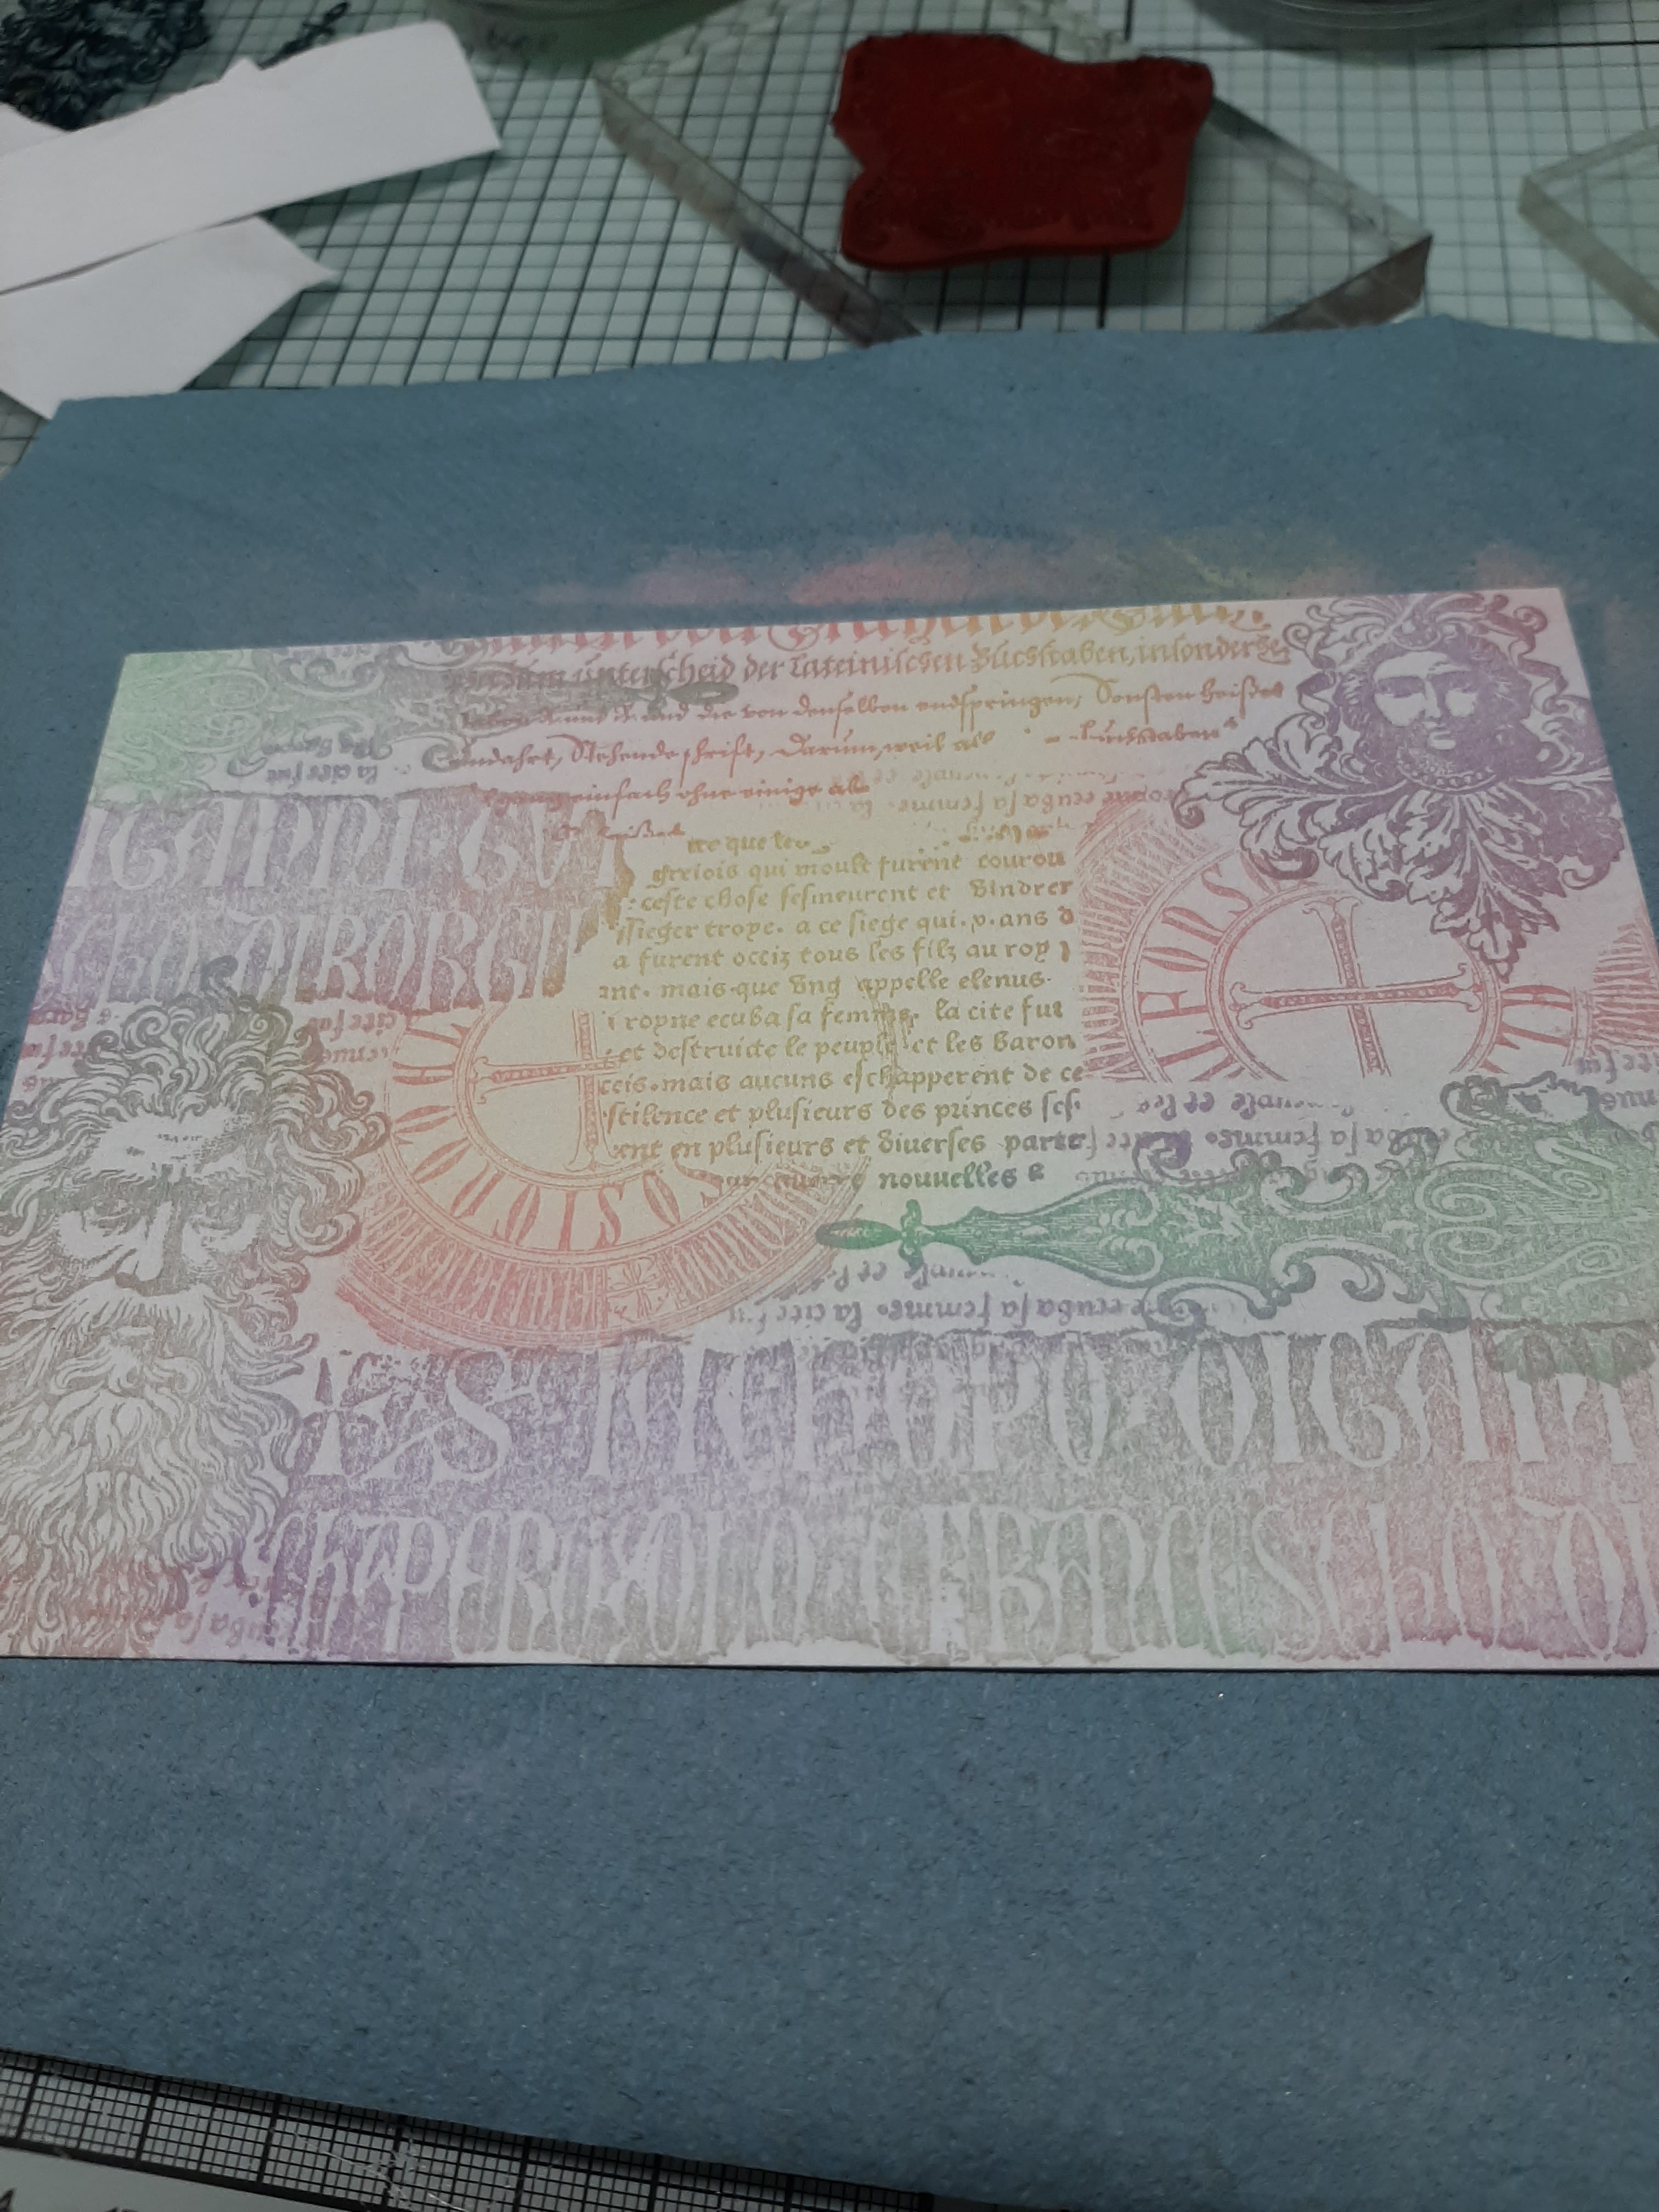
Now I was so absorbed in my work that I forgot to take any more pictures.
But it is not that difficult and can easily be done without the pictures.

With the black ink, I stamped the text of Carmens Veranda stamps in the middle.
With the same black I stamped top left and bottom right a part of the de Long swirl stamp.
Let the black ink dry thoroughly so that you don't get smears.
Now with the stencil and the moddeling paste you make the white circles.
This gives it a little more depth and interest.
Matt the card and then you're done.
I hope you liked it.

The Lost Coast designs team would love it if you would join the challenge.
You can even participate with stamps from other brands.
And of course there is a prize to be won.
So join the fun, I look forward to seeing your art work on the LCD/Carmens Veranda stamps blog or facebook.


donderdag 15 juni 2023

Today a new challenge at Lost Coast Designs. 'Use some word's" focus on the sentiment.

Hi there, 
This card could pass for a clean and symple card.
It is quick and easy to make.
I kept it simple because this challenge is more about the sentiment.
Take a look at Carmens Veranda, you will find so many sentiments stamps there.
Sweet, serious and above all a lot of very silly sayings.
I always laugh so hard at all the funny sayings.
But now how I made this card.
I used:
Versafine Onyx black
Distress oxide Speckled egg.

I love the shadow frames.
They give you the opportunity to quickly create a beautiful background.
For this background I used Distress oxide and the largest shadow frame.
I didn't put the ink completely full on it.
I thought it would be nicer if there were some light spots here and there.
Stamped the silhouette dancer with Versafine onyx black.
And the beautiful saying of Carmens Veranda stamps above it.

I would like to invite you to join the challenge.
You have a chance to win stamps, and you can even participate with other brands of stamps.
Please read the rules first to avoid disappointment.
Hope to see you at the challenge.


This card joins the challenge at:
We love stamping, CAS card.


donderdag 8 juni 2023

Challenge at Lost coast designs,June #168 - Mini Me (smaller than a card) so ATC, Bookmarks, Tags, Inchies, Twinchies,

 For the mini me challenge I made a bookmark.
Something different than a card is always a nice change.
I made a bookmark with a butterfly resting on top of the book.
This is what I used:

Distressink,
Victorian velvet,
Speckled egg,
Bundled sage.
Color pencils in these 3 colors.
Versafine black onyx.
Silver thread.
Posca marker white.
Corner scissors or punch.
White paper 200grams.
Gleu.

How its made:
Cut a piece of paper in this size.

Make spots on the paper with the 3 colors of distress ink.

Stamp the florish with the black versafine.

Color the florish with the colored pencils.

Stamp the largest butterfly of the set twice, with the versafine.
The largest because it was for a very thick book.
If you have a thinner book, take a smaller butterfly.

Color the butterflies with the pencils,
 and give them some accents with the posca marker.
Cut them out.

From the silver wire we make the feelers / antennae of the butterfly.

Take a piece of paper 1cm wide and 10cm long.
Score at 1cm, 5cm, 9cm.
Fold the centerline.
Fold out the 2 score lines as shown in the picture.

Cut a line in the middle of the butterfly that is the same size as the paper.
Put the paper through and glue the flaps to the bottom of the butterfly.

When you've done that it will look like this.

Now take the other butterfly and glue the 
feelers/antennas to the blank side of the butterfly.

Now glue the 2 butterflies together.
There may be an edge sticking out here and there with the butterflies.
Carefully trim that away a bit until they fit together perfectly.

Now take the piece of paper with the florish.
With the corner scissors or punch we cut beautiful corners.
With an ink blender and bundled sage we put the edges on a bit.

Now fold the bookmark with the flap of the butterfly in between.
Check that everything is in the right place.
If that's good, glue it closed.


I hope you find it a nice tutorial and will also make such a nice bookmark.
And don't be shy, feel free to show the result on the facebook group 
of Lost coast designs/Carmens veranda.
Also don't forget to join the challenge.
You then have a chance to win beautiful stamps of your own choice.
So click here for the challenge.
And here for the facebook group.


This bookmark is entered in the "Butterfly challenge",
1.    Make any style card/project using at least 2 of the colours on the wheel +butterfly. 


woensdag 24 mei 2023

Challenge at Lost Coast Designs/Carmens Veranda blog. Woman, (especially Frida Kahlo).

For my DT project for this challenge,
 I chose the Frida skull.
I had an unused background lying around,
 and I thought it was suitable for this card.

What I used:
LCD Frida skull
LCD Pieces of Calligraphy 
Chipped sapphire
Spiced marmelade
Saltwater taffy
Evergreen bough
Black soot
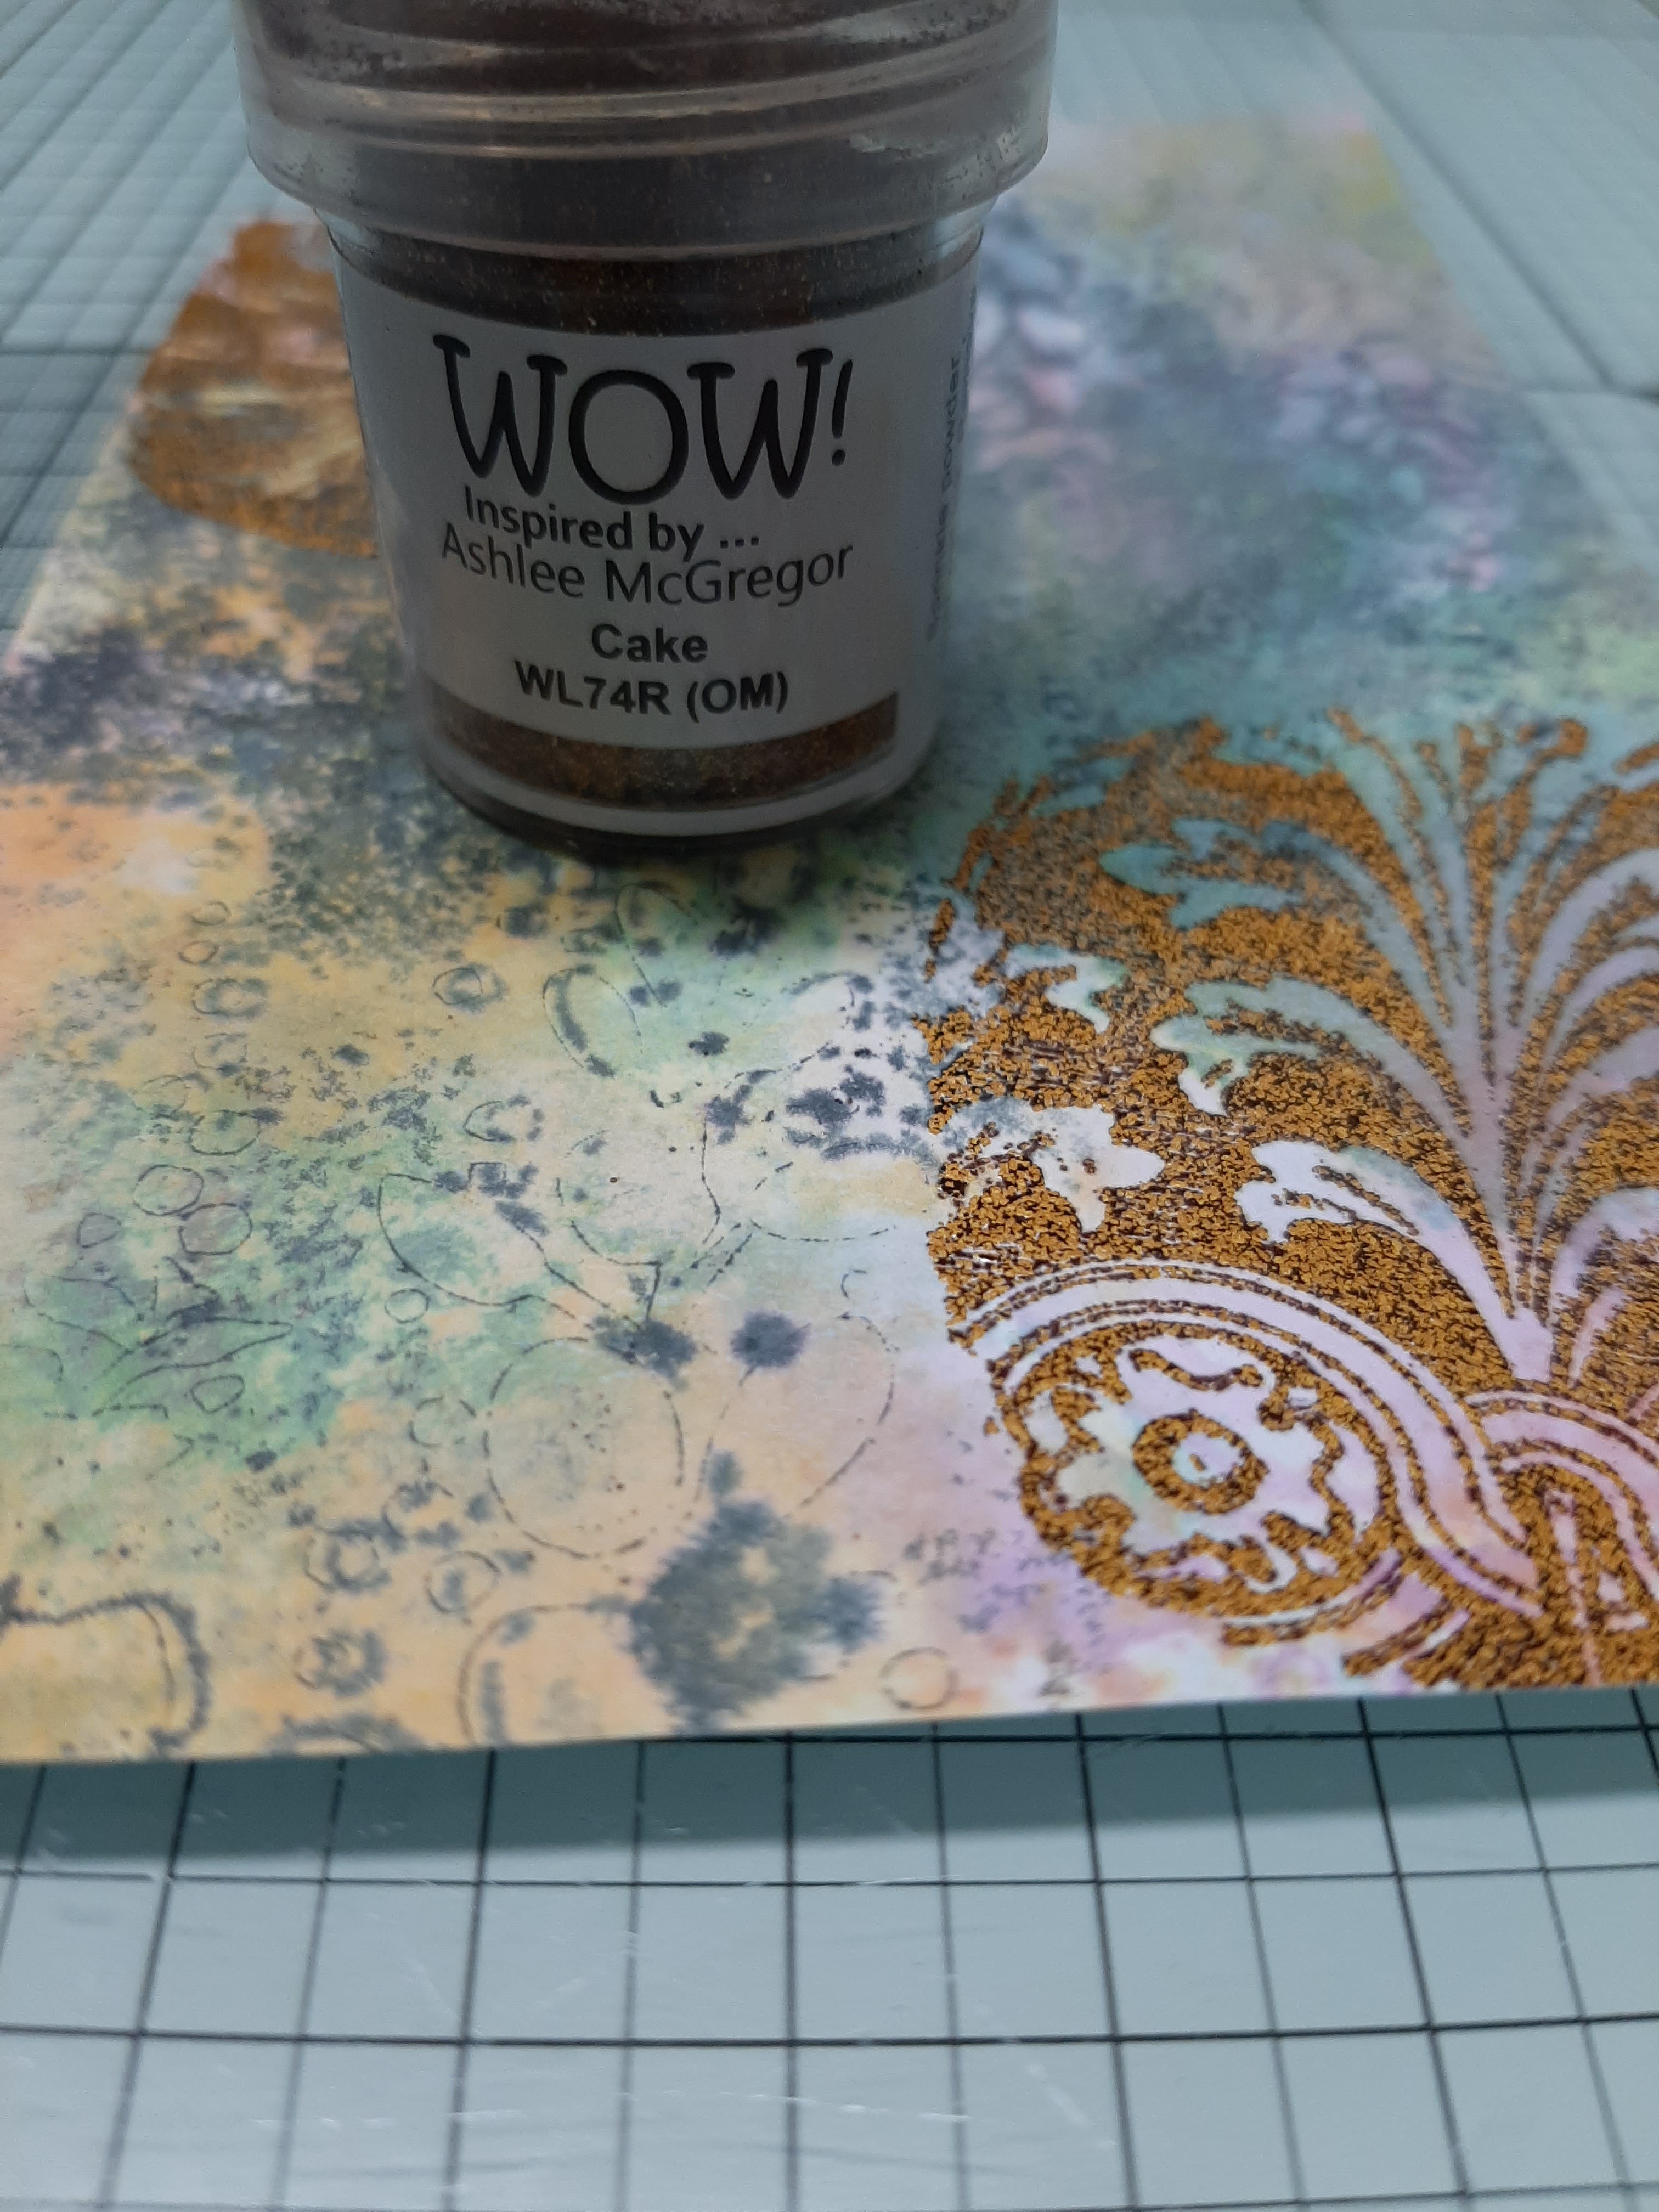
WOW embossingpowder Cake, WL74r(OM)
Versamark 
Versafine onyx black
Vellum or Parchment paper
Die, Nellie's choise vintasia frames 
Color pencils or markers,

How I made it:
To start, we use the distress inks and
 water to make some puddles of ink on the craft sheet.
We dab the paper on that.
Dry it with a heat tool.
We dab black soot on the stencil and spray it with some water.
Now place the stencil with the ink side on the background.
The intention is that you get a faint print, so not on the entire paper black ink.
The colored background should show through.
Take an ornament stamp from the Pieces of Calligraphy set.
Stamp the top left and bottom right corners with Versamark.
Sprinkle the WOW cake embossing powder and melt it with the heat tool.
I wanted to see the colors of the background in the embossing powder.
So it may be that a different color embossing powder is better for you.
With versafine onyx black we now stamp the Frida stamp.
We color the stamp with pencils or markers.
What you prefer.
Cut out the Frida skull and stick foam tape on the back.
Die cut the ornament from the vellum.
Glue the ornament on the card and the Frida skull on top.
Matt on black cardstock.
I hope you liked it.
Get started now and join the challenge.
Maybe you are the winner of new rubberstamps.
The challenge is here.

donderdag 18 mei 2023

The challenge at lost Coast Designs is all about "Woman"

 
Hi there, I made this card with the beautiful stamp "mother of dragons"
The sentiment is one of the many sentiment stamps by Carmen's Veranda, Girl with a mind.

I colored the stamp with Derwent Inktense pencils.
Those are my favorite pencils.
I made the text with white embossing powder.
I matted the card on a dark blue card stock.
And again on a white card stock.
I hope to see you at the challenge and maybe you will win that great prize.
New stamps are always fun to win.


woensdag 10 mei 2023

The paper piecing challenge at lost coast designs/Carmens veranda stamps


Good morning dear blog readers.
Today my second contribution to the "Paper piecing" challenge.
I chose a Halloween theme.
The LCD stamp Frank is so much fun and definitely suitable for paper piecing.
Here is the explanation for this Halloween banner.
What I used:
Lost Coast Design, Frank.
Lost Coast Design, Spiderwebs background.
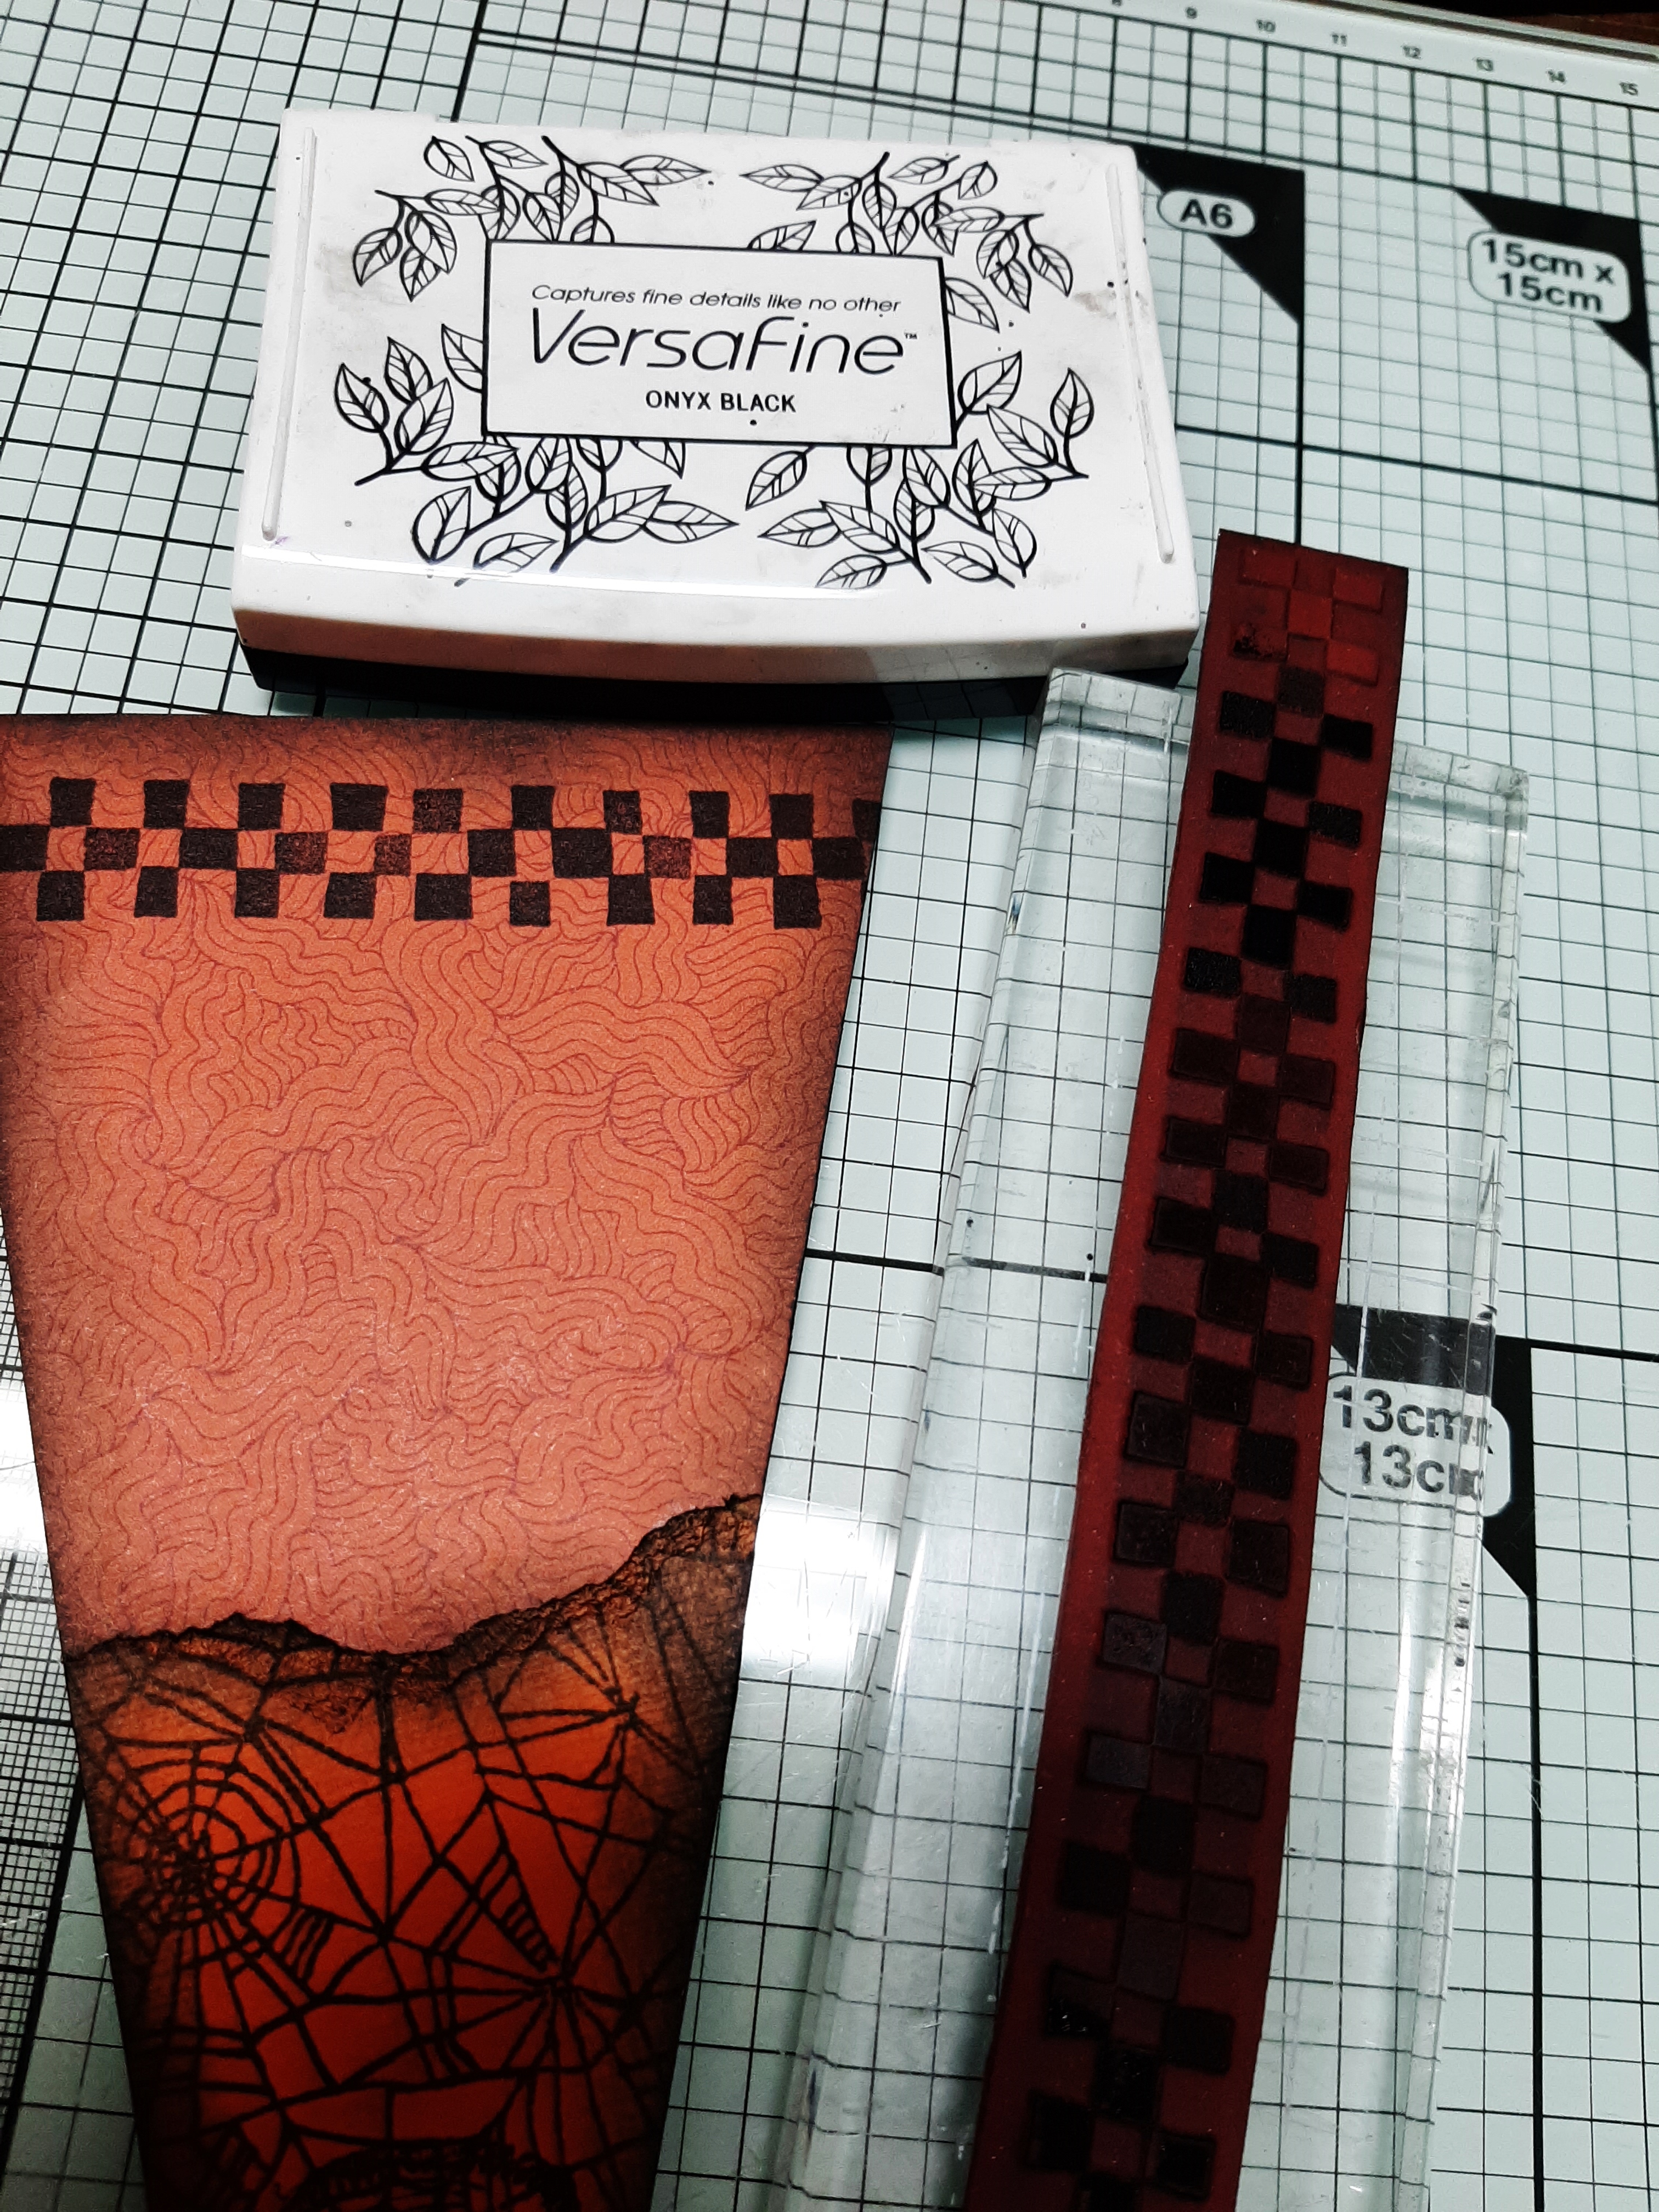
Lost Coast Designs, Rustic checkerboard border.
Carmens veranda, Witches go riding.

Stazon black,
Distressink Black soot,
Versafine onyx black.
Die with bats.
Markers or pencils.
Designpapers with a small print.
Black paper for the bats.
Orange paper for the bottom half.

Now we strart.
I started with a basic cardboard in point shape.
For the top half I took an orange paper with a fine print.
And for the bottom an orange paper stamped with the spiderwebs background in stazon black.
I tore the top of the spiderwebs paper,
 and applied some Distressink black soot with an ink blending tool.
 
Now we glue the two halves on the white cardboard in point form.
Ad some Distressink black soot with an ink blending tool on the edges.

Now we stamp the Rustic checkerboard with the versfine.

With the versafine I stamped the text from Carmens Veranda On a purple die cut.
Ad some Distressink black soot with an ink blending tool on the edges.

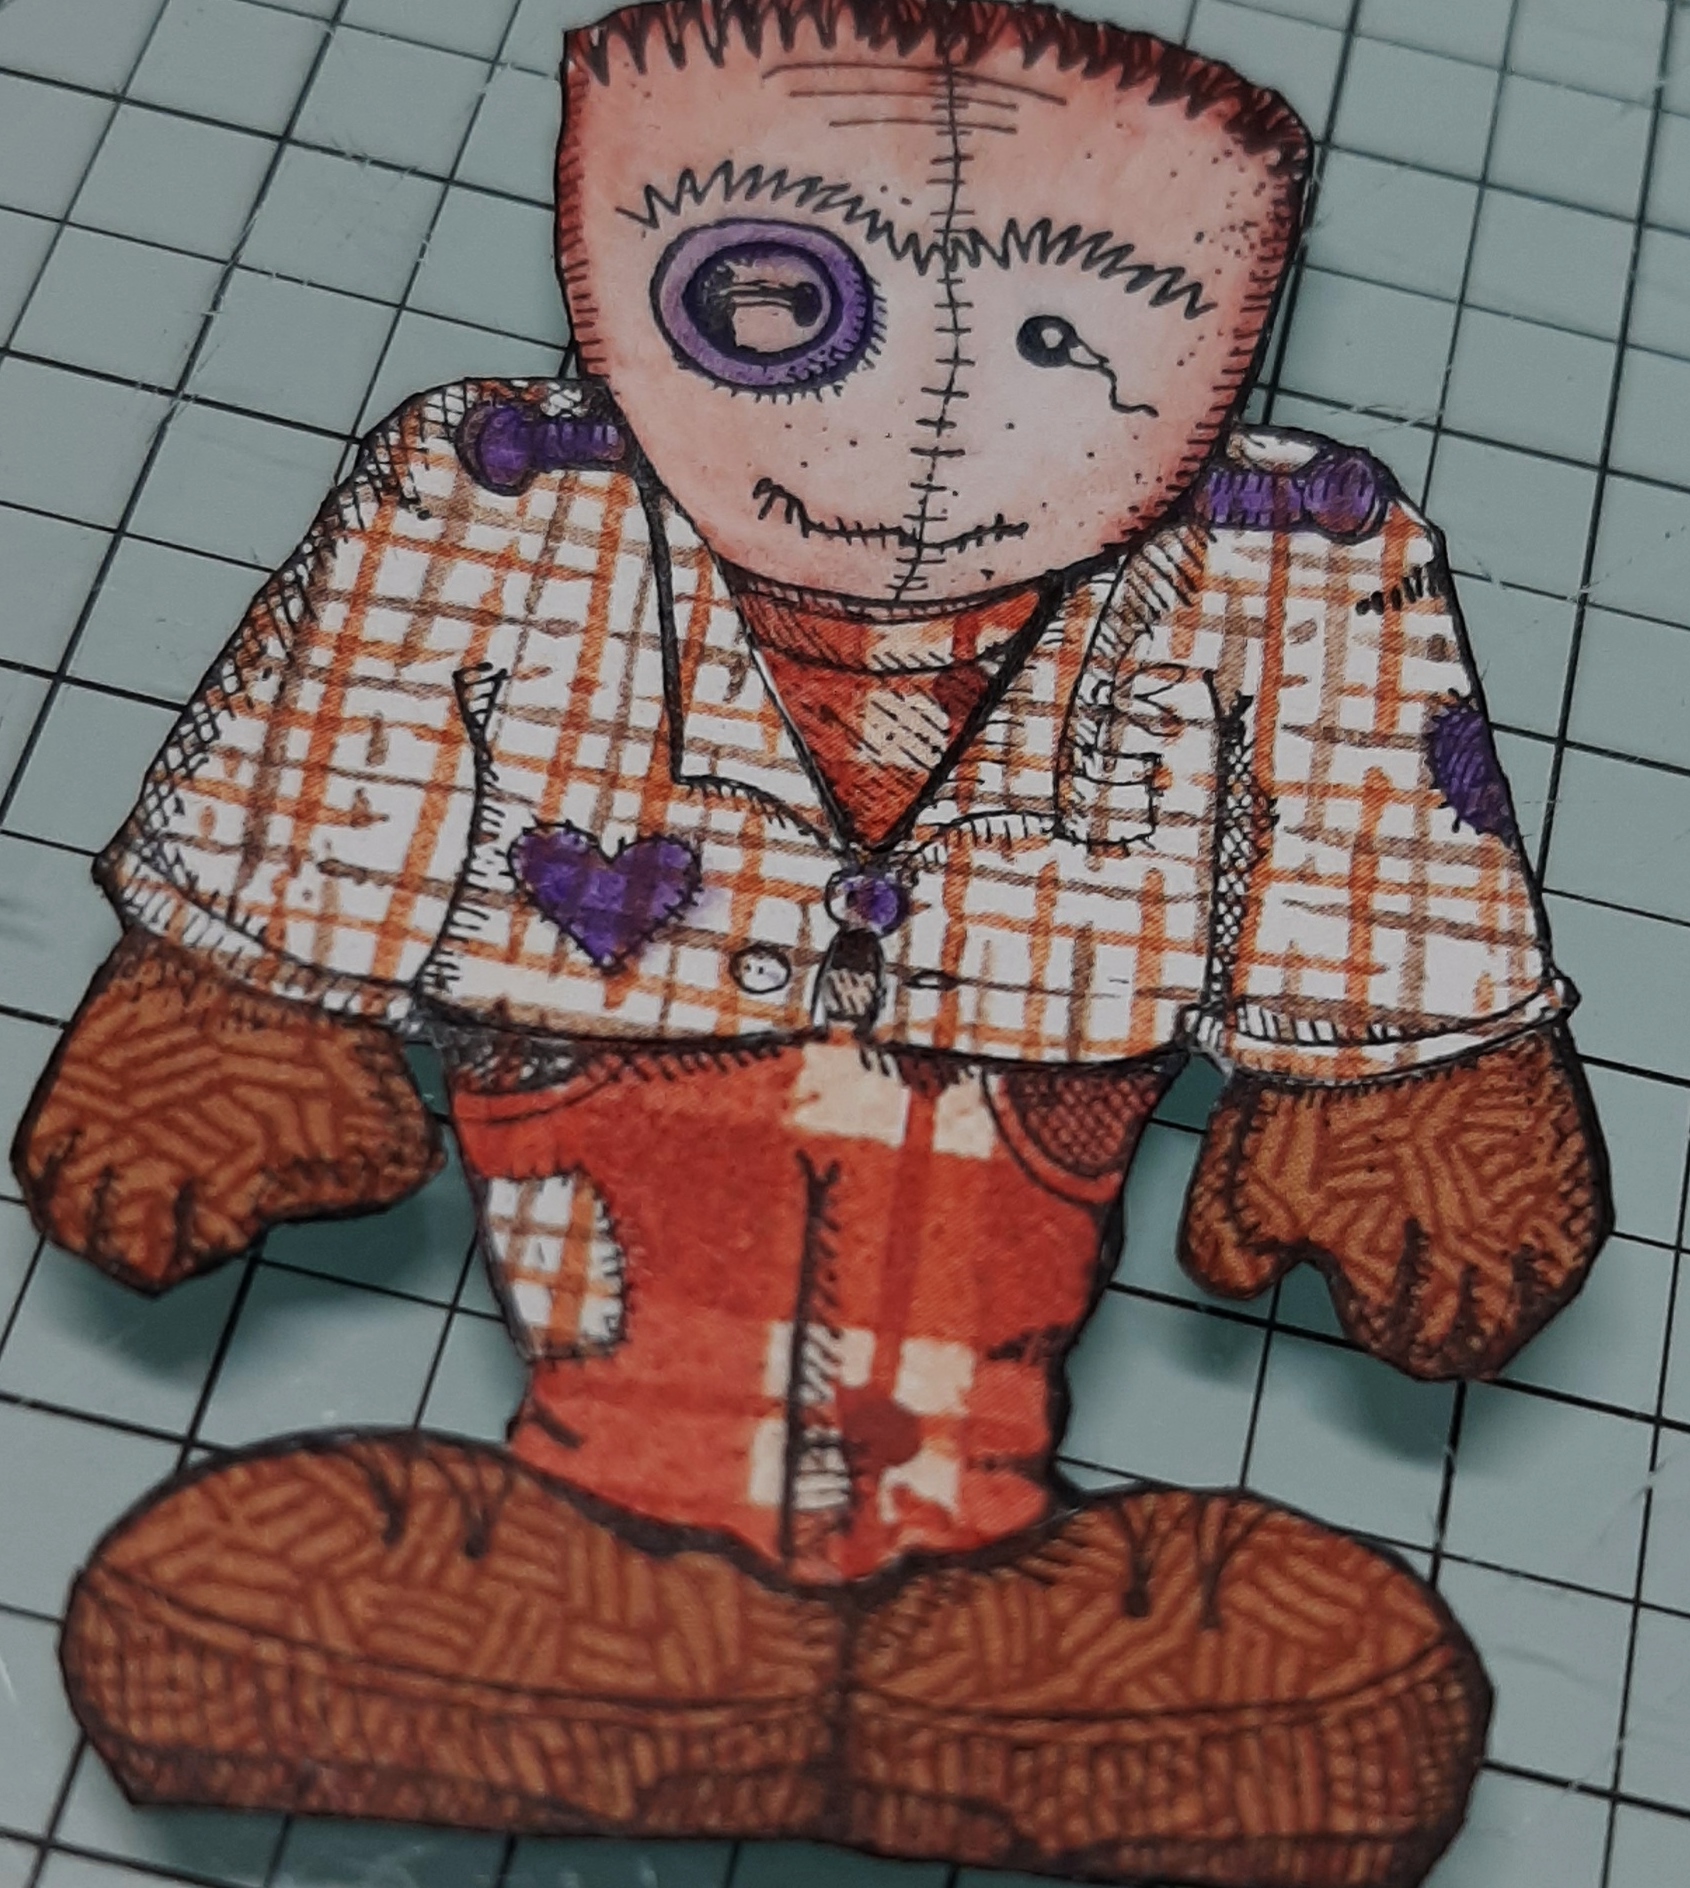
First we stamp Frank on white paper with stazon black.
Color only his head.

Then we stamp Frank on three different design papers and cut out all parts.
We cut out the white frank in its entirety.
That is the base where all clothing pieces are glued on.

With a purple pencil I colored the details.
The pockets are done eith a small piec of paper.
I gave Frank gloves in the same paper as the shoes.
I stick the text and frank with some foam tape.
Glue the bats and glitter stars on the text label.

Make two holes and thread a piece of string through them.
So you can hang it.
I hope you liked it.
Our team cordially invites you to join the challenge. 
It's so much fun and you also have a chance to win stamps, so join us!
Please read the rules to avoid misunderstandings.
I wish you good luck in the challenge.


zondag 7 mei 2023

Pink ink designs, Pigtastic set. Ton sur Ton coloring.

 A while ago I won a challenge at Ink Art Designs.
I then chose the Pigtastic set from Pink Ink Designs.
Finally had time to do something with it.
This is such a super cute stamp set. Thanks again Dot Leathbridge


maandag 1 mei 2023

Lost coast designs challenge "Paper piecing".


Hello stampers and other crafters.
Today the new challenge starts at lost coast designs and Carmens Veranda stamps.
Subject is paper piecing.
Well that's not my field at all, but still fun to try out.
So let's get started with some design paper with a very fine pattern on it.
I took 3 different designs.
And stamped the south-west city two times on each paper with black stazon ink.

The base card is a slimline.
I inked the slimline card for a third of the card with Distress Oxide Antique linen,

And worked to the top with the next colors.
Broken China, Blue print scetch and Chipped sapphire.

I sprayed some water on the upper part of the card.
Then I cut apart the houses in parts and puzzled them in a suitable order on the card base

For the text I used the Carmens Veranda text stamp "Dog hair".
I only inked the words I needed.
Never leave home without a kiss.
To do that I used some tape on the words I don't want to stamp,
 then pulled the tape away. 
Then I stamp the text in the right place.
Stick a dark blue mat behind it and the card is finished.

I hope you enjoyed it and maybe give it a try yourself.
Feel free to join the challenge, you have a chance to win rubber stamps.
Please read the rules first to avoid disappointment.
Hope to see your work on the challenge blog of Lost coast designs and Carmens Veranda stamps.